introduction of Hassy's Sera
model
EXY10 October, 1990 registration / March, 1996 purchase (run 39500 km)
engine
5E-FHE 1500 cc normal (painted black cylinder head cover)
exterior
body painted "super white II", front fog lamp, rear fog lamp, side markers, side steps from AE92, rear spoiler from AE92, front and rear red emblems, wipers painted white, front brake and rear brake painted red
interior
steering wheel by Momo, aluminum gearshift knob, gearshift boot like MT, aluminum pedals, additional 3 meters, Kenwood transceiver, radar detection machine, rear speakers bracket, rear strut tower bar, Kenwood MP3 player
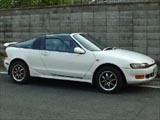 |
This is a whole image. Hassy's Sera is painted not original color. The side steps and rear spoiler are my boast. |
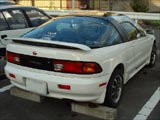 |
This is a back figure. Probably this Sera is the first one in the world which equipped the rear fog lamps within bumper. The side markers also shines. But turning on and running rear fog lamps is about 2 times per year. |
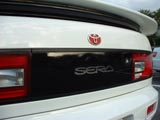 |
The red Toyota emblem is added. The rear spoiler cut off three legs and filled holes, is attached directly. The name plate of Sera in the rear garnish is deleted an inner side and is made the character transparently. If a light source is attached, the name logo will shine. |
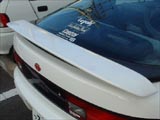 |
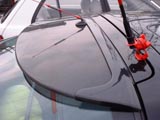
Bird's-eye view of the rear spoiler. There is no impact as if it looks like an original part. But comparing with a normal Sera, there is a difference clearly. It costs little money. |
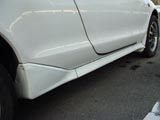 |
The side steps from AE92. I feel the stability increase of side volume. |
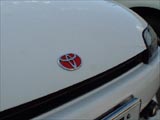 |
I changed the emblem like a Honda Integra Type-R. I did not paint it but used an new part for a red Sera. The red emblem is so conspicuous on the white body. |
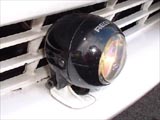 |
Front fog lamps. projector type. |
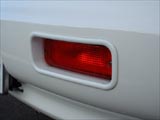 |
This is the first Sera with rear fog lamps inside bumper in the world. I have ever received question of this rear fog lamp from foreign country by e-mail. |
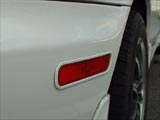 |
These are side markers. Attaching them is more difficult than to attach rear fog lamps. When the lamp switch is turned on, the side markers will be switched on automatically. |
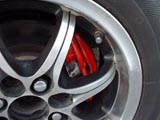 |
The brake was painted red. But a brake pad is still original. Therefore, since there is little generating of the dregs of a brake pad, it does not become dirty so much. |
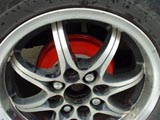 |
The rear brake drum was also made red. Although a crack goes into paint by heat, I don't mind very much. |
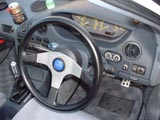 |
This steering wheel is Momo. Although I like Nardi in fact, since Nardi being used before has been tired, I chose it because design resembles former Nardi most. |
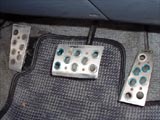 |
These are pedals made from aluminum. Although it is changeless to effect of a brake in spite of having exchanged them, the driver's seat was decorated sporty. |
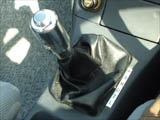 |
This is the gearshift boots of black leather and the gearshift knob of aluminum. It is often mistaken for MT. This customizing was very difficult. |
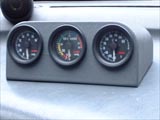 |
Additional meter installed in the passenger seat side. I reused the skin of a rear tray so that it might harmonize with an original design. This meter box is quite my original work. |
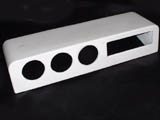 |
This is a meter box had used before. The meter united with the transceiver occupied the dashboard by the side of a passenger seat. Of course this is my original work, too. |
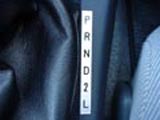 |
It is the indicator of AT gearshift. It is written by the instant lettering on aluminum plate and covered with lamination. It is not illuminated in the dark, but I can understand with feeling any positions. |
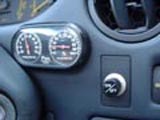 |
They are a thermometer and a hygrometer inside cabin, and the switch of a radar detection machine. |
 |
A red switch is for overdrive. The left is for fog lamps and the right is for rear fog lamps. Two silver things like a tablet are the indicator lamps of each ones. |
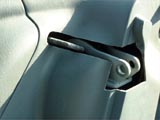 |
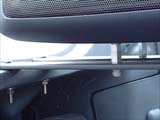
This photograph is the rear tower bar attachment portion. Although some interiors must be cut like this, there is no problem because not interfering in a rear sheet. distortion of a body decreases and rigid improvement can be felt. The front tower bar is also very effective. |
 |
The outer skin of an original speaker board separated. Furthermore, since making noise when driving was not pleased, I made the bracket of a speaker from iron. This speaker was so heavy that I selected carefully material. It is fixed with four screws. |
 |
The enlargement of a rear speaker bracket. Although the speaker was jointed with the brackets directly, noise occurred. Version 2 is levitation style using the metal spacer between a speaker and an outer skin. |
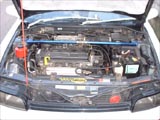 |
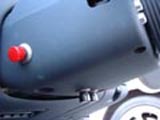
The engine room with front strut tower bar. You can look at the power-steering fluid tank painted red. You can see also the old color. |
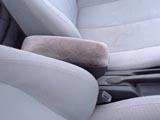 |
The used parts, the console box that I bought at the recycle parts shop. Although I had it before, I have sold off it because an elbow hits at the time of steering. However, since changing my mind, I attached again this part as useful. |
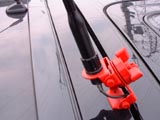 |
This is the radio antenna stand for 430MHz. When B pillar was painted black, I also painted it red as an accent on the white body. |
 |
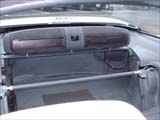
The rare item, this is a rear sun visor that I bought from the recycle parts shop. The crew member of a backseat is protected from the strong sunlight of summer. Though it is not useful very much, My Sera got a good style. |
| [home] |
| [about sgf] |
| [other's sera] |
| [exchange engine mount] |
| [repair air conditioner] |
| [mail to hassy] |